Table of Contents:
Not the most stunning of subjects, but fraught with trauma and (almost) money-burning stupidity.
This not a “go-to-the-shop or go-online and buy a PC” story. This is a “order the bits and build it yourself” story. It’s much more fraught with woes and pitfalls. Oh yes.
I worked in IT, did I mention that?
Working with computers was – and still is – one of my favourite things to do. In fact (as I’ve mentioned several times right here on this site), I made a 24 year career out of it. And I still love to tinker around with them, even now in retirement.
Granted that nowadays it’s not the big budget(!) server systems that I used to design and build, but there’s still a certain frisson to be had when building your own PC from parts. It’s not necessarily cheaper as such, but the point is that the parts that you order are the bits that – in your opinion – will make for a decent PC based on your specific requirements.
The old one
My old desktop PC (the “main one” as I call it) was also built from separate components. I bought my first component system in about 2007 and have upgraded it once since; in 2018. By upgrade, I mean that I replaced the motherboard (including CPU, cooler and memory) in 2018. I’ve also (over time) replaced all the spinny-disks with SSD drives, for that lovely “I’m going to perform like lightning for 1 second” performance.
In 2007, I bought the whole PC: case, power supply, disks, motherboard (and motherboard accessories) and CD/Blu-ray drive The case also had a floppy drive and a card reader supplied with it, which came in handy at the time. I can’t recall exactly how much it cost, but it would have been quite expensive. It was (at the time) quite a high spec, on par with a “gaming PC”. I also bought a TV card that I hooked up to both satellite and terrestrial TV services (and used it as a PVR for years).
By 2018, things were getting a little slower, the card reader (and floppy drive, for that matter) was no longer required and disk/motherboard technology had increased sufficiently to warrant some upgrades and changes. Large SSD’s were still quite expensive, but the smaller ones (suitable for system drives) were cheap enough and so a new motherboard, memory and CPU was bought for the existing PC case. Upgrades ensued – water cooled CPU for the first time – and a much faster PC.
From 2018 to 2025, I pretty much didn’t upgrade much. All the disks were replaced with SSD (as they had come down in price considerably), the TV/PVR system was retired (as I was recording nothing from terrestrial or satellite providers) and the network got upgraded to 10Gb fibre with a new switch and a clone PCIe network card (done to match the 10Gb networking on my NAS box).
The new one
Let the trauma begin.
I started off looking at new motherboards. Sufficient time had passed to replace not only the motherboard, but the CPU and memory along with it. With new motherboards come new technologies, M.2 NVMe SSD drives being one of those new technologies.
No longer did you have to have separate disk drives in your PC, you could have these small M.2 NVMe SSD cards masquerading as drives plugged directly into the motherboard. The motherboard I was looking at could accommodate six of them! No longer the trailing SATA cables and the bolting-in of drives. It’s all contained on the motherboard, all very neat and tidy!
From motherboards, I started looking at motherboard bundles on sites like Scan and Overclockers UK. I’m biased towards Overclockers UK (OcUK), as I had bought the original PC parts from them in 2007 and the upgrades in 2018 (they are quite competitive in the UK, price-wise).
From bundles, I started looking at new cases and cooling options. Before I knew it, I’d specced-out a whole new system: case, cooling, motherboard, power supply and upgraded memory. I’d also looked at the recommendations from OcUK in terms of the power supply and case, to provide a more robust power system and a high airflow case to assist cooling.
I ordered an 8Pack Elite – Asus ROG Z890 Hero – Intel Core Ultra 9 285K@5.5GHz Overclocked Bundle.
Spinny-things
As mentioned, I wanted replacement SSD drives; replacing the separate 2.5″ Samsung QVO drives I’d already been using in the old PC. The M.2 drives (static-y-things rather than spinny-things I suppose) I wanted to (near enough) match the capacities of the old SSD’s if possible, however I wanted the same amount of them. I was able to do a close-ish match.
I’d researched the M.2 drive situation a bit, as I’d not had any experience with them (other than shoving two in my NAS). They apparently run quite hot and you could get drives with built-in heatsinks. Four drives were required: 1 x 1Tb for the system drive and 3 x 4Tb for storage.
Bus speeds
This is something that I’ve never (well, hardly ever) had to consider with a home PC. The six M.2 slots are rated at two different bus speeds: three of them run at PCIe 5.0 x 4 and three of them at PCIe 4.0 x 4. That means that out of the four drives that I want, one of them will have to be a PCIe 4.0. Which – considering the read/write speeds on these drives – is no big deal. I decided that the media store drive would be the slower one (as a bonus – also cheaper than the PCIe 5.0 drives!).
This was what I ordered:
- 1 x PCIe 5.0 1Tb M.2
- 1 x PCIe 4.0 4Tb M.2
- 3 x PCIe 5.0 4Tb M.2
I ordered Samsung drives, as I’d had some very good experiences with the 2.5″ Samsung QVO drives I’d had in the old PC. In my opinion, I thought them better than the Crucial and Kingston drives I’d already had (and replaced). Samsung 9100 Pro for the PCIe 5.0 and Samsung 990 Pro for the PCIe 4.0. Together, they cost almost as much as the motherboard bundle 🫤
The other bits
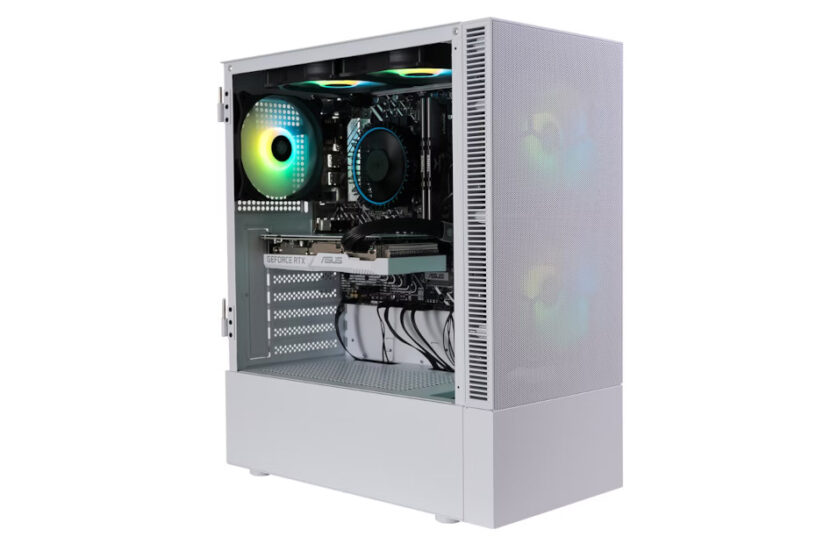
For the case and the power supply, I ordered a Phanteks G500A in white (the black ones were out of stock) and a Leadex Titanium 1600W Power supply. I’d also doubled the memory by adding a matching memory kit, to make 96Gb of overclocked memory-infused goodness (this was when the dark clouds of foreshadowing started to form).
I also threw in a pack of three extra 140mm cooling fans – although three came with the case and the CPU cooler had three fans of its own – I also wanted one at the back just to exhaust out of the back of the case. That left me with two spare fans in case some stopped working (I’ve had this experience in the past!).
OK, so job done… or so I thought.
The day arrived
Parts were ordered and paid for. Whilst it seemed like an eternity before it arrived, in reality it was less than a week. The nice man from DPD dropped it off at my house and the fun commenced to begin.
I’d thought about how I was going to build it: power supply, case, motherboard and then anything else left over was the general plan.
All of the required fixtures and fixings come with the case, so bolting in the power supply and the motherboard was reasonably straightforward. The CPU and one set of memory was already installed (I bought an overclocked bundle, so it was assembled for me), all I had to do was add the additional memory kit, after checking that it matched what was in there, of course.
The fans
The case – like many other gaming style cases nowadays – comes with built in LED lighting arrays. In my case (ha!) there’s three fans in the front, there will be three fans at the top (for the CPU water cooling radiator) and the one extra fan at the back of the case – all with RGB lighting. There’s also RGB strips across the top of the case (for the power button) and across the bottom of the case (which has a glass side for display purposes). Turns out the memory and the CPU water pump are RGB LED enabled, too.
Whilst instructions are available for wiring up all this LED goodness, I didn’t find them terribly intuitive. But still, they were all wired up and they all worked – controlled by the motherboard. I didn’t know it at the time, but I’d revisit this LED lighting setup after the build.
Then it came to installing the drives.
Stupid, stupid, stupid
I’ll be populating M.2 drive slots 1 to 4. 1 will be the 1Tb C: drive, 2, 3 and 4 are the 4Tb storage drives – no.2 being the PCIe 4.0, so I need to ensure I put the Samsung 990 Pro in that slot. Given that the storage drives are all 4Tb and the last two are identical, I thought it prudent to install the C: drive and the 990 Pro first, identify and format them once the PC was up and running, then add the others afterwards – just to make sure I identify the correct ones for the correct purpose I need to use them for.
The first drive was the C: drive; the 1Tb Samsung 9100 PCIe 5.0 Pro with heatsink. The slot for M.2-1 on the motherboard had a big metal heatsink on it, held down by a lever system. That was removed and the first disk inserted. Took a moment or two to work out the sliding plastic clip arrangement, but that all went well and the drive was held duly in place. Of course the big heatsink wouldn’t fit on the top of the already heatsink-supplied drive. Ah.
Would that matter? I didn’t know. Consult the internet.
The general consensus was that if the drive had it’s own heatsink with heat tape underneath and there was plenty of airflow through the case, then it should be OK. Good-o! I thought.
OK, onto the other drive. This is the 4Tb Samsung 990 PCIe 4.0 Pro with heatsink drive, destined for slot M.2-2. Slots M.2 2 to 6 are underneath a big heatsink plate that has to be removed for access. Four screws later, the M2.3 are revealed. The 4Tb drive duly plugged in and locked into place. Lovely.
It all looked quite good, so on with installing Windows 11 – which was pretty straightforward, as you would expect for a new build. I use local accounts instead of the Microsoft ones – which cuts out some of the somewhat irritating pointless question and answer scenarios when you create an account, and all went reasonably well.
Windows updates were done, the supplied driver disk was applied – all bits of hardware found, updated and working as expected. Great stuff, now for the other 4Tb drives.
I grabbed one of the 4Tb Samsung 9100 Pro drives and went to install it into slot M.2-3. It wouldn’t fit.
The heatsink that surrounds the drive makes it slightly wider, as well as taller. Slot M.2-3 is right next to – and I mean very close to – slot M.2-2 where the 4Tb 990 Pro is installed. The width of the 990 Pro and the width of the 9100 Pro wouldn’t let them sit side by side. Oh for fuck’s sake.
Consult the internet.
It turned out that I needed drives without heatsinks. Drives without heatsinks looked like they would fit side by side and the motherboard heatsink plates would do the required heatsinking.
Leaving me with a dilemma. Do I return the heatsinked drives (all four are with heatsink), or do I invalidate the warranty and remove the heatsinks on the drives themselves? Would they even work if I did? The internet told me nothing.
I made the decision to remove the heatsinks from the drives. Yes, it invalidates the warranty, so if they fail, I can’t get a warrantied replacement.
I thought I’ll at least remove the heatsink from one drive; to see if it’s even a viable solution. I chose the 990 Pro, as that’s the cheapest one (PCIe 4.0) and has no data on it. If I had to replace it, it wouldn’t cost as much as the 9100 Pro drives. Fortunately, the heatsinks appear to be screwed together and looked as if they’d disassemble without any problems.
Which – surprisingly – it did! Once unscrewed, the heatsink shell came off without issue, leaving the PCB card inside. Comparing what I had to pictures of the same drives without heatsinks revealed that they looked like the same product. All Samsung did was to screw some metal around it and call it a heatsinked drive.
That meant that I could remove all the heatsinks (invalidating the warranties on all the drives. LOL.) and fit the drives with the motherboard supplied heatsinks and heat tape.
There’s lessons to be learnt!
I could have looked into the whole M.2 drive thing prior to committing to buying the drives. Had I done so, I would have sourced the correct type and not had all this aggravation and hassle. Yes, they are working fine now, but not until I’d spent a few days researching it. And of course my drives are now not under warranty either. So I am very stupid in that respect.
But I also think that Overclockers UK could have had a hand in this, too. I ordered a case, a power supply, a motherboard bundle and some drives. To me, that would indicate that it’s a PC system that’s being put together from these parts. Now the question is: would they know that the drives wouldn’t fit on the board? And if they did, wouldn’t it be outstanding customer service if they asked me if I knew that? It would be outstanding customer service if they did that indeed, and it would guarantee my return business. As it stands they didn’t (for whatever reason), so I may consider shopping elsewhere in future or of course, being less stupid.
Moving on
OK, so motherboard, drives, power supply, extra memory and fan arrays all installed. Powered on to BIOS, just to see what the settings were. All seemed to be OK, so I went ahead and installed Windows 11.
Twice. I installed it twice, as the first time I installed it, I mistakenly installed a bunch of crap that came with the driver package to control the LED lights, the sound system and various other gaming-orientated things. I didn’t want that, so I rebuilt it again, but without all of that crap.
From that point started a litany of errors.
A litany of errors
What seemed like a pretty much standard PC build turned into a long list of stuff that wouldn’t/didn’t/couldn’t work. It probably didn’t help that I was building the PC during some of the hottest days in the UK, where the temperature in my office was near enough 31 degrees Celsius for quite a long period of time. The overclocked CPU was not a fan (ha!) of that and kept shutting the PC down.
Running hot
Well, it’s going to run quite hot, because it’s overclocked by quite a long way. I managed to alleviate most of that by switching the cooling fans (all of them) to maximum speed. A bit noisy, buy not really noticeable enough for me to care, especially when using earphones. But even with the fans at full pelt, it wouldn’t stay on during the hotter days of 30 degrees plus.
I had some options: I could remove the overclocking, thereby reducing the heat generated by the CPU and memory. That would certainly make it run, but noticeably slower. Given that I live in the UK, the number of really hot days are few and far between, so I opted not to remove the overclocking. I’ll just not run it during the two hot days per year.
I did make some changes to the chassis fan and CPU fan electrical connections. I’d plugged the CPU radiator fans into a chassis fan connection and I don’t think the motherboard liked it. I initially had a BIOS error telling me that the CPU cooler fan was under speed (as I hadn’t plugged the radiator fans into it at the time), which I had to override. Once I’d swapped the CPU radiator fan connection to the CPU fan socket, that error went away. It made no difference, as the fans run at full speed, but still.
I suspect I could have changed some settings in the BIOS, in order to raise the point at which the PC would shut down due to CPU overheating. I decided against that, as I didn’t want to risk damaging the CPU. I’d already put the expensive NVMe disks at risk by stripping off their heatsinks, I didn’t want to push my luck any further.
Memory issues – BSOD (page fault in non-paged area)
It took a long while, using memtest to diagnose memory issues. It wasn’t because I had faulty memory, it was because the overclocked memory didn’t like extra being added. As far as I can make out, the four memory slots share the data between two of them each. So by adding two extra sticks of memory, it introduced errors by making the processing do much more work flipping between lanes (or so I can make out!). Removing the two extra sticks made the memtest errors go away.
I suspect that if I removed the overclocking, the errors would disappear (but I didn’t try it): I had 48Gb RAM with the two sticks, which should be enough. It did specify on the Overclockers bundle specification that it would support up to 64Gb of RAM – which I would assume (but they didn’t specifically say) would be two sticks of 32Gb. The reasoning why I think it wouldn’t work with the extra two sticks as it would make it 96Gb in total – exceeding the 64Gb stated max.
I opted to stick (ha!) with the two sticks of memory with the overclocking in place.
But I still suffered from the occasional BSOD (page fault in non-paged area). After a deal of research that returned no ideas at all, I removed the system page file; I have lots of RAM, so don’t really need it and I usually remove it as a matter of course. That seems to have done the trick and I am BSOD-free up until the time I wrote this post (conscious of the fact I may have just jinxed it!).
LED “issues”
Not really issues as such: there are two options for controlling the LED lights. Through a push button on the chassis case, or through the motherboard. I’d plugged all of the LEDs into the motherboard, which meant I had to have some software loaded on the PC to control it (this was part of the original software bloat I experienced on the first build of Windows 11). I wasn’t keen on the software, as it installed a whole bunch of crap I wouldn’t need and certainly didn’t want.
I did however like some of the lights, so I opted to physically unplug some of them (the fan LEDs mainly) and just have the power indicator strip, the motherboard lights, the memory lights and a light strip at the bottom of the case on – all of which I could control from the BIOS.
I did get bored with that in the end and opted to turn them all off through the BIOS. If nothing else, it switched all of the lights off when the PC was off, saving power and irritation from ambient light!
Network card issues
I mentioned at the start of this post that I’d bought a 10Gb clone network card for the old PC. The plan was to use the old card in the new PC for networking.
The new PC did come with 2.5Gb and 5Gb RJ45 ethernet ports, as well as 1Gb WiFi7 capabilities all built in. The Wi-Fi came in handy for the initial build, but I ended up using the 5Gb ethernet socket to my 1Gb switch, before I’d installed the 10Gb NIC.
The 10Gb NIC installation went well, but the performance did not. I spent a good deal of time diagnosing data copying faults when copying large amounts of data from my PC backups on the NAS back to the new PC. I kept getting dropouts and the occasional BSOD.
I eventually bought a new 10Gb NIC – an ASUS one to match the board. Once I’d fitted that, the PC picked it up straight away, installed the drivers automatically and all of the copy errors disappeared. Not only that, I’m now getting in excess of 8GBPs file transfer speed to my NAS – something I could never achieve with the older clone card.
Monitoring software
In the light of the heat problems I’d been experiencing, I thought I’d better put some sort of monitoring tools on the PC, just to keep an eye on things. Some were included in the original install of all the bloatware – I did use something called AIDA64 Extreme from that package. I also installed Samsung Magician software to keep an eye on the disk temperatures and performance.
Disks
I didn’t appreciate just how fast the NVMe disks are until I installed one of my older SSDs into the PC! For a short while (whilst I was having issues copying files – assuming it was due to the network card) I put one of the 4Tb SSD disks from the old PC into the new PC on a SATA 6Gb connection. I was surprised to see that the transfer rate to that (about 140MBPs) was far less than to the NVMe drives (about 6 to 8GBPs – that’s GB, not MB!).
I soon knocked that disk on the head. It was just too slow!
Bluetooth, specifically headphones
The new motherboard comes with not only on-board Wi-Fi, but also on-board Bluetooth. My plan was to ditch the ageing wireless headphones I’d been using with an optical cable on the old PC and use the Bluetooth headphones that I use with my phone and tablet.
This was all fine, up until about 90 minutes into a film or programme. Then it started crackling, dropping out and generally losing sound. It was also slow to pick up – I’d lose the first couple of words of a YouTube video, for example.
After much hum-ing and ha-ing, I replaced the Bluetooth headphones with the old wireless ones, connected as before with the optical cable. Much better!
The saga doth continue
As I use the PC, sometimes something will pop up that doesn’t seem to work properly. I just address those as and when they happen.
Generally though – as long as it isn’t too hot – the PC is working very well and I am pleased with it.
Would you do it again
Some people would probably have called this a stupid and rash decision. But would I do it again: of course I would. Maybe I’ll wait for another seven years though! The massive increase in disk I/O alone makes it worth the vast amount of money I’ve thrown at it. Despite the fact that those very disks now have no warranty, of course.
Could I have bought something fully built for half the price (or under) that would do the same? Yes, of course. Would have been such “fun” though? No.
Overall, despite the trials and tribulations: happy days.